Trail System Breakdown
*Note all the screenshots are from inside Unreal Engine 4
The trail system is based on dynamic vertex painting that is used in games to achieve some cool interaction.
Some concepts that we will be using to achieve the trail system.
Dynamic material instance - It works just like any other material instance with an additional ability that it can be updated in runtime by changing the parameter. Each time game begins it creates a new instance of material and assigns it to whatever mesh you desire. Later on, you can use the reference of the material to change a particular parameter of the material and it will reflect in the world.
Render Target - It is a widely used tool. The render target is just a copy of a texture page which allow you to read from it or write on it during runtime as well as it can be made available outside of runtime which allows it to be used on multiple occasion and on various kind of implementation. Read and write operation of render target is a very costly process so use it wisely
The Various Steps Involved
1. Initializing playable area with a Dynamic material.
2. Getting the player position.
3. Painting the world.
4. Deleting the paint after a delay.
5. Checking for the fail state.
Initializing playable area with a Dynamic material
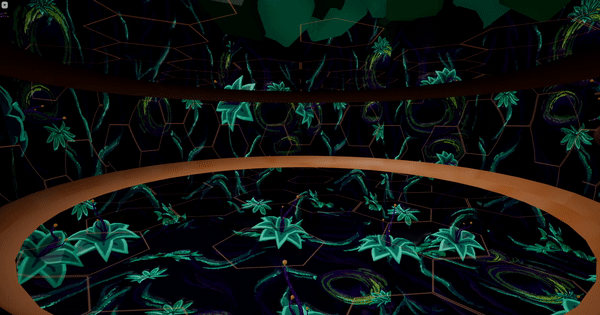
To make the gameplay area paintable by the character it was important to think the ground in terms of a canvas where the color will be painted depending on the player position. Once that was established, we can start with assigning the play area with a dynamic material that will be painted (0,0,0,0)/black at the start of the gameplay.

Below you can see the dynamic material that was used in the game and how they correspond to (0,0,0,0)/black and (1,1,1,1)/white color. The reference of the material was also assigned to MI Wall in the above image so later it can be used to access the alpha property


Arena Grid Material
(0,0,0,0)

Paint Material
(1,1,1,1)
Since Arena Grid Material is associated with the clear alpha or black color. Setting up the dynamic material to a full black will initialize the play area with a clear material.
Render target can be created before or after creating the dynamic material but we need the reference i.e MI Wall to access the alpha property so I created it after assigning the material to mesh.

Now you are wondering what does the alpha in the material does. It is actually just the 2nd texture, in our case Paint material. Here is a part of what material looks like.

As you can see all the channels of the material have an alpha value attached they have the ability to switch between whatever goes in A and B nodes of the Lerp. Thus all we will do in the game is manipulate the alpha values.
Getting Player Position
The next thing was to know what is the player's location in the texture coordinate. This can be done by getting a hit result on the ground and then finding which pixel it corresponds to in the texture.


Let's assume the position of the player in the world refects to somewhat shown in the image at right. But it is not directly available to us. We need to calculate the accurate location and then position the paintbrush to that location.


The x coordinate and y coordinate value is used to find the exact position on the texture coordinate of the material that the player is currently on.
Painting the world
After getting the coordinate of the texture. We can start painting on the texture and it will reflect in the world. As the paintbrush already has a (1,1,1,1) value the trail gets added to the world in corresponding locations.
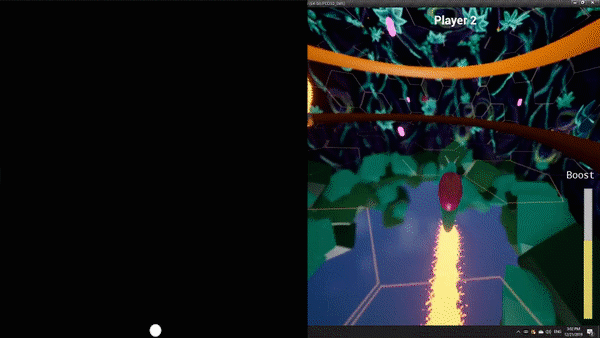
Above you can see an example of how painting on a texture page is reflected in the gameplay area. The effective location is determined by the player character in the world and then translated to the location on texture. By changing the alpha of the textures in those pixels, painting can be done.

Here I am using this texture to paint. The distance between each stroke depends on how often you are checking for the location. This depends on lots of factors like how fast the player character moves. In my case, I was doing it every couple of milliseconds. Any more than that tend to reduce the FPS. Since we also had a feature to boost in the game it is visible that the distance between the splashes becomes a little farther as the snail boosts.
Deleting the paint after a delay
This one is easy once you know what are the coordinates of texture that has been painted by the player. Using an Array to save this data is the way I achieved it. Coloring those coordinate back to what they were will delete the splashes from the play area.

As you must have already guessed using the same technique again but with a reversed color will start restoring the world with its original material.
Checking for the fail state
The best way I thought of doing this was to check for what color values the world directly under the player was. This was done before painting the world.

Using this you can determine what is the alpha value is for the ground just underneath the player. In my case, I just checked the value of just one channel to determine if the player collided with other player's trail.